8-bit CPU: Clock module
The parts are finally here an I can have some fun! Since nothing runs without clock, I decided to start with that module. It's probably not the most fun one, but I definitely need it, before doing something else. I was planning to follow Ben's design to some point.
I had some TS555CN timers at home, so I decided to try those first, before opening the package with the new ones I ordered. Wired up the 555 in basic astable configuration with capacitors, potentiometer and decided to test if it works.
So I connected a LED to the output and powered it up. It worked. Well, sort of. LED blinked and I could adjust the frequency, but then suddenly it started to blink very fast, then again back to normal. What's even stranger I could trigger or suppress the effect by touching either chip or capacitor (just top of the chip, not the leads). I did accidentally connect my power backwards on first try 😓, so I figured it caused some damage or something. Replaced the chip with one of my newly-ordered LM555CN and the circuit worked fine.
Only later (while building other modules) I noticed, that I forgot to wire the RESET pin. It appears, that TS555 is a CMOS one, while LM555 uses bipolar transistors. While bipolar technology tends to pull unconnected input pins either up or down, CMOS ones doesn't and are highly susceptible to electrical noise if pins are left floating. So the timer was actually fine and just resetting itself. After wiring the pin, I decided to put the TS555 back in. Yup, still works.
Note to self: Check the connections first before blaming the parts!
Wiring next LM555 for debouncing the manual clock button went without unexpected issues (I used LM chip now, so another floating RESET pin went unnoticed).
Now on with the mode switch. Ben used some up/down push switch, but while ordering the parts I thought that it would be cool to use one that I can flip to the left and right. It turned out there were 2 problems with my choice:
- It won't stay on breadboard. Most of the time I just pulled the switch off, instead of toggling it. I might, however, still decide to use it on the PCB version, because it is much harder to pull out a soldered-in part ☺.
- I wanted a switch that toggles between 2 states, but what I had actually ordered was one that stays in the middle position, but you can momentary pull it to one or other side (then it returns to the middle by itself). Since the mode switch circuit is a SR latch, it would still work, if you are not too worried about the initial state when powering on.
I might still use the switch in final build, but in the meantime I had to think of something else. In the end I plugged in a small header with 3 pins sticking up and put a jumper on, connecting 2 pins. Not too fancy, but still does the job.
Ben used another 555 chip to debounce the mode switch, using its built-in SR latch. But hey, if it's a SR latch we need, why not use that. So instead of "abusing" the 555 timer, I used 74HC02 and wired up 2 NOR gates in SR latch configuration.
To be able to see the state I connected a pair of green and red LEDs to the latch's output pins. The latch again sort-of-worked. It toggled to the state I want, but would not really stay in the desired state when jumper was removed.
I already had an idea what may be wrong. Connected ampermeter in series with one of LEDs. Sure enough: it pushed 36 mA through the poor LED. Measured the voltage - it dropped to level that did not allow it to latch in properly. So current-limiting resistors for LEDs are a must when building with HC-series logic. That solved the issue.
While measuring, I accidentally connected multimeter (in ampermeter mode) across power supply rails and blew its fuse. Luckily I had few spares.
Note to self: Be careful where you connect the leads of the multimeter in current measuring mode. Blown fuse just causes frustration. Especially if you have to replace a physical one afterwards.
Ok, now that the latch is working properly, we can use it to choose desired signal (auto or manual). It turned out, that by deviating from Ben's design, I've accidentally stumbled on a way to save some gates.
- Ben used output signal from 3rd 555, then used an inverter to get the complementary signal. I have access to both outputs of SR latch, so I already have both.
- Then he used a pair of AND gates to select which signal to use. OK, can not improve here, adding 74HC08 chip.
- After that he used an OR gate to tie both signals into one, so he adds another chip and uses just one gate from it. But hey - I already have something very similar on board - couple of unused NOR gates (74HC02 has 4 of them, I used just 2 in my SR latch). If I put those signals through NOR I get almost what I need, just the signal is inverted. But then I can use the other one to revert it back.
- But there's more. Ben used an inverter and another AND gate to disable clock's output when HALT line is high. But it appears, that I can just feed the HALT line into one of inputs of that last NOR gate (which I used to revert the signal back) and achieve same effect.
In the end, for that part of circuit, instead of using LM555, 74LS04, 74LS08, 74LS32 I used just 74HC02 and 74HC08. And I even have 2 unused AND gates there.
Well, I have to admit, that by not placing an inverter chip on the board, I've lost the feature of inverted clock signal (Ben adds it much further in the series, by just using another gate from the inverter chip). But I think, I will probably find an unused inverter or other invert-able gate closer to the place where I need that signal.
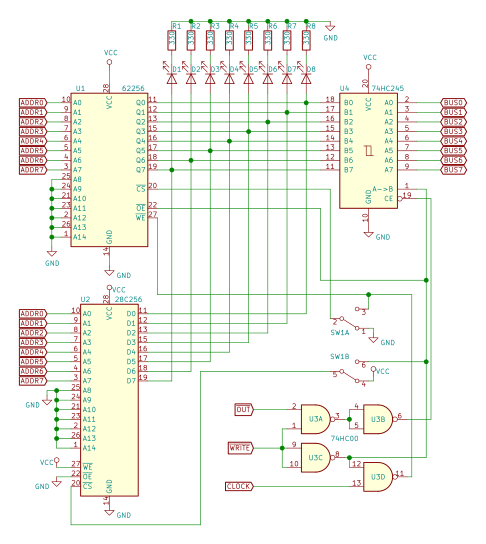
And here it is:

In the beginning of the build I thought that the clock is quite boring part, which just has to be done. But in the end, those small setbacks turned it into quite interesting journey.
Some time later I found out that there is also a 556 chip, that is a dual version of 555 timer. That could have been handy! Also I have some ideas on further improvements, but I'm not really sure if they belong to clock module at all. Well, you can always find a way to improve something.


Comments
Post a Comment